HOLA A TOD@S !!!
Este domingo os traemos un DIY sobre darle un nuevo uso a zapatillas que pensábamos tirar , que ya no nos gustan o que no sabemos con que combinarlas. Además de ser muy práctico ya que nos ahorramos algo de dinero , también es muy divertido «hacernos » nuestras propias zapas .

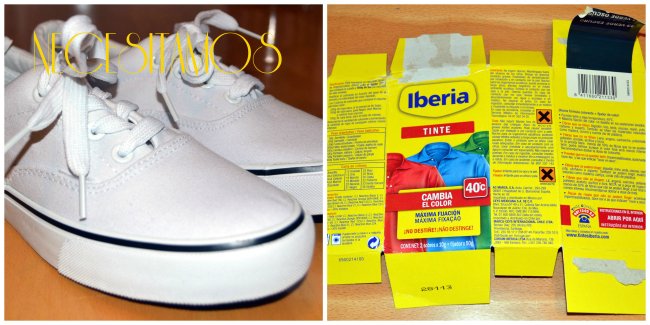
Unas de las ideas que se nos ha ocurrido es decorar unas zapatillas dándoles un estilo vintage . Para conseguir este estilo vintage necesitamos :
Los pasos para conseguir las zapatillas que queremos son :
1 Escogemos las zapatillas que queramos reciclar .
2 Compramos un tinte ( en el propio tinte vienen las instrucciones para poder teñir correctamente las zapatillas ).
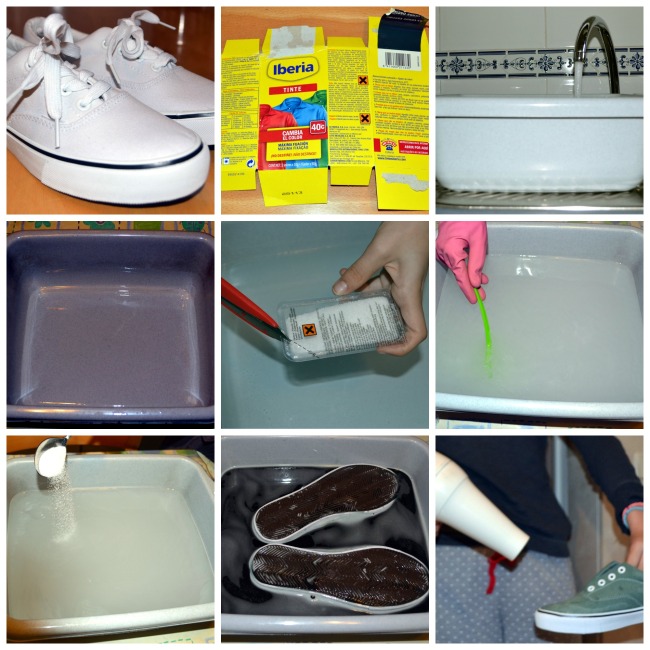
3 En un cubo ponemos agua .
4 Ponemos el fijador ( viene con el tinte ).
5 Echamos sal ( 5 cucharadas por cada litro de agua ).
6 Removemos hasta que que la sal y el fijador estén bien disueltos .
7 Echamos el tinte , removemos y a continuación sumergimos las zapatillas en el agua .
8 Dejamos las zapatillas sumergidas durante 40 minutos (aprox.)
9 Sacamos las zapatillas del agua , lavamos ( por encima ) las zapatillas .
10 Dejamos secar una noche (aprox.)
11 Por último cuando las zapatillas estén secas, pero con un poco de humedad les damos un toque de calor con el secador . Así consiguiendo que algunas partes estén más claras y otras más oscuras .
Aquí os dejamos la foto del resultado comparándolas con el antes y el después :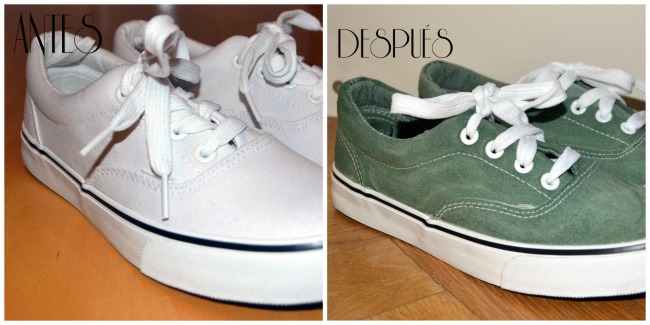
La otra idea que se nos ha ocurrido es decorar unas zapatillas con un efecto de degradado . Para conseguir este estilo vintage necesitamos :

Y los pasos para conseguir estas zapatillas son:

1 Escogemos las zapatillas que queramos reciclar .
2 Compramos un tinte ( en el propio tinte vienen las instrucciones para poder teñir correctamente las zapatillas ).
3 En un cubo ponemos agua .
4 Ponemos el fijador ( viene con el tinte ).
5 Echamos sal ( 5 cucharadas por cada litro de agua ).
6 Removemos hasta que que la sal y el fijador estén bien disueltos .
7 Echamos el tinte , removemos y a continuación sumergimos las zapatillas en el agua .
8 Dejamos las zapatillas boca abajo 10 minutos.
9 Inclinamos las zapatillas para dejarlas prácticamente verticales contra el cubo.
10 Subimos la mezcla de colorante y agua hacia la mitad de la zapatilla con ayuda de una cuchara, repetimos este procedimiento bajando cada vez más hacia la punta.
11 Dejar la zapatilla, sumergiendo la punta únicamente, otros 20-30 minutos.
12 Sacamos las zapatillas del agua y las enjuagamos.
10 Dejamos secar una día (aprox.)
CONSEJOS :
1 El color del tinte se puede graduar todo depende de la cantidad de agua y de tinte que utilicéis.
2 Si las zapatillas no son de un color muy claro es recomendable que compréis un decolorante para que el acabado sea mucho mejor.
Esperamos que os haya gustado y que os sea útil.
¡NOS VEMOS EL PRÓXIMO DOMINGO! UN BESO A TOD@S!
Y acordaros de seguirnos en Twitter: @toobigtoolittle
This Sunday we bring you an awsome DIY: updating your old trainers!
For this DIY you will only need a pair of trainers and clothe colouring.
We hope you like and enjoy this easy way of refreshing your old trainers.
For the first DIY the steps to follow are:
1 We choose the shoes you want to update.
2 Buy the clothe colouring (in the colouring itself there are instructions to properly coloure the shoes).
3 In a bucket put water.
4 Add the fixer (that comes with the colouring).
5 We take salt (5 tablespoons per liter of water).
6 Stir until the salt and fixer are well dissolved.
7 We take the colouring, stir and then put the shoes in the water.
8 Leave the shoes in the water for 40 minutes (approx.)
9 Then take out the shoes of the water and wash them slightly
10 Let them dry overnight (approx.)
11 Finally when the shoes are dry, but a little wet we give them a touch of heat with the hair dryer. So some parts are lighter and some darker.
For the second DIY the steps to follow are:
1 We choose the shoes you want to update.
2 Buy the clothe colouring (in the colouring itself there are instructions to properly coloure the shoes).
3 In a bucket put water.
4 Add the fixer (that comes with the colouring).
5 We take salt (5 tablespoons per liter of water).
6 Stir until the salt and fixer are well dissolved.
7 We take the colouring, stir and then put the shoes in the water.
8 Leave the shoes upside down for 10 minutes.
9 We bow shoes to let them almost vertical against the bowl.
10 We put the colouring and water mixture until the middle of the shoe with a spoon, we repeat this procedure more and more towards the tip.
11 Leave the shoe, dipping the tip only 20-30 minutes.
12 Take the trainer of the water and wash it slightly.
10 Let it dry one day (approx.)
TIPS:
1 Clothe colouring can be adjusted, all depends on the amount of water and colouring used.
2 If the shoes are not of a very light color we recommended you to buy a bleach to finish much better.
That’s all for today so we hope you liked them, and…
SEE YOU ALL NEXT WEEK! KISSES.
Remember to follow us on Twitter: @toobigtoolittle


